|
|
HOW TO MAKE YOUR OWN
SLOW FEED HAY NET
In 2011 I came across a business on the web run by lady who made slow feed haynets she called "hay pockets". I bought two of them
and loved them, but when I wanted to add a few more a couple years later, the site was gone. So I did a little research and
using my original nets as "templates", made my own. I've had a lot of questions about these nets over the years and decided it might just be best to make a web page showing how they are made, so folks can make their own. My original hay pockets are still in use
as of this writing (January 2022) and you'll see a picture of one later on this page.
This is
because the netting is very durable- it is hockey netting! We have tried other netting (Hay Chix)
one time in our slow feed box, and found
the knots and relatively thin cord did not stand up to regular use. The knots make it easier for the horses to grab and pull at the netting, which they can't do with the hockey netting
(it is knotless and thicker).
I also feel the knots might be harder on their teeth. It lasted
maybe 2 years - it got to whenever I refilled the box there were new
holes in the netting,
If anyone knows the name of the lady who made the original Hay Pockets, I would love to credit her here! I can't thank her enough for her brilliant design!
WHAT YOU WILL NEED
60" wide hockey netting in at least a 4 foot length (it is sold by the foot)- plan on at least 4 feet to make one net, 5 or 6 feet for a bigger, longer net.
We get ours from Arizona Sports EquipmentA pair of sharp scissors
Cording to lace up the net- also available from Arizona
Sports Equipment
A small hand held torch or lighter
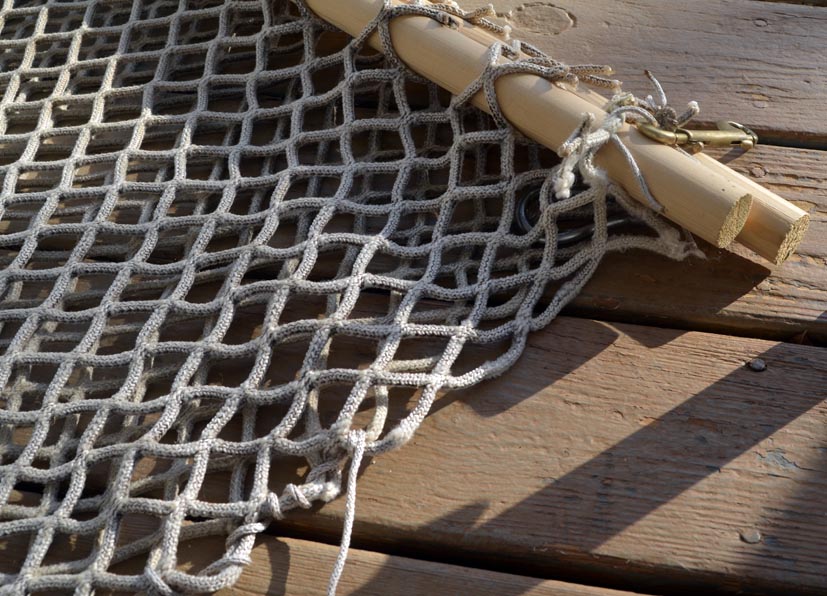
Two 1 1/4" wood dowels- four foot long- available at Home Depot or similar home improvement store. Drill a hole about 2" in from each end (see photo below).
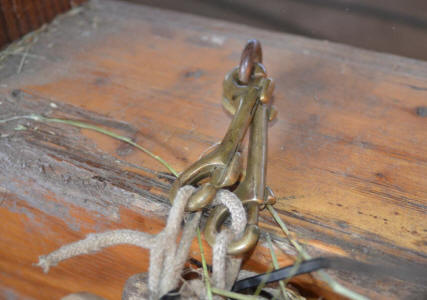
Four double ended snaps- I prefer the solid brass as the metal ones rust and can hurt your hands- Jeffers Equine has good ones (be SURE and select the solid brass ones). You can also use spring snaps.
On this particular net I'll use both just because that's what I had on hand.
Two large heavy duty spring snaps to fasten the back of the net to your fence, gate or stall wall.
Four screw eyes to mount net to stall wall or fence setup (more about that later).
The pictures below are all thumbnails- just click on them if you need to see a larger view.

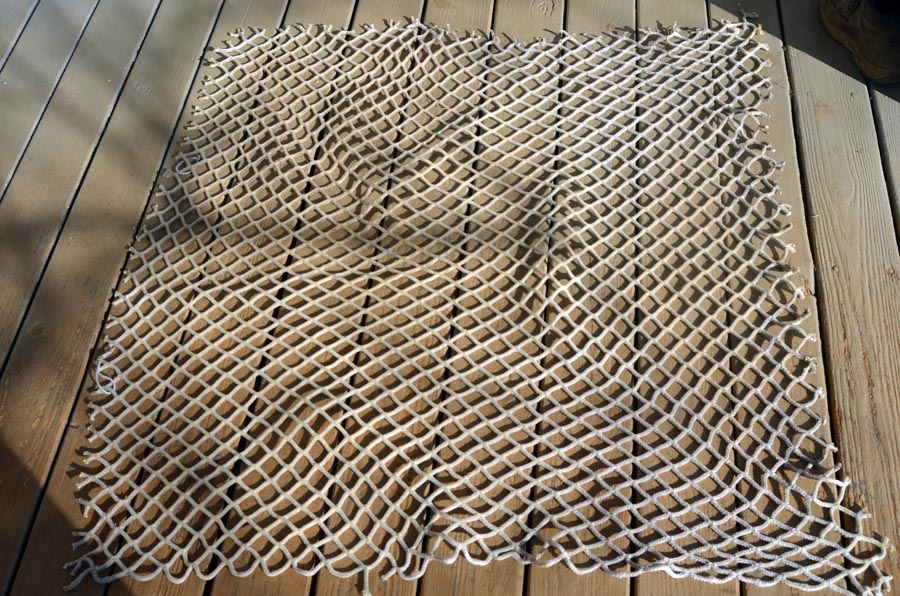
Here is my netting piece. This is actually old netting that was in continual use from 2016-2022. It was a big net and I wanted two smaller ones instead. So I cut it in half. Your new netting will be much whiter than this.
But it does speak to the durability of this type of netting. This piece is still in near perfect condition.
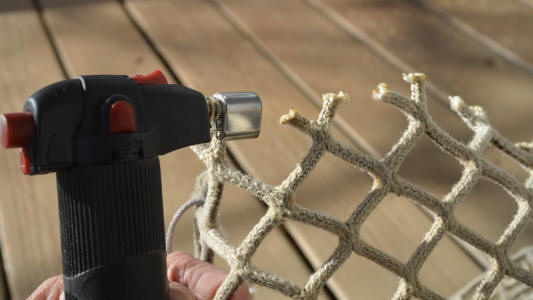
Any ends of netting or cord that you cut should be melted with your torch so they don't fray. Do this outside so you don't burn your house down,
LOL! I like to work on my porch.
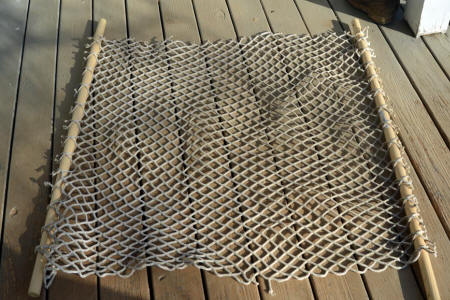
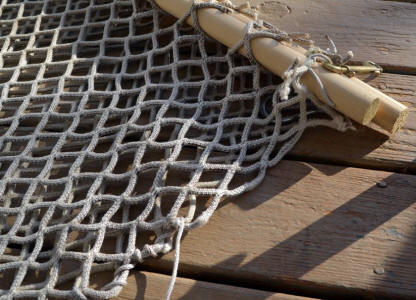
Thread the dowels through the two short sides of your netting (this piece of netting is more square so it wouldn't really matter, but hopefully your net will be bigger.
I'm just working with what I have on hand for the purposes of demo).
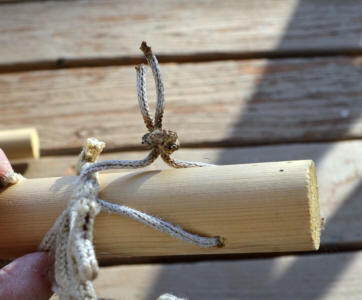
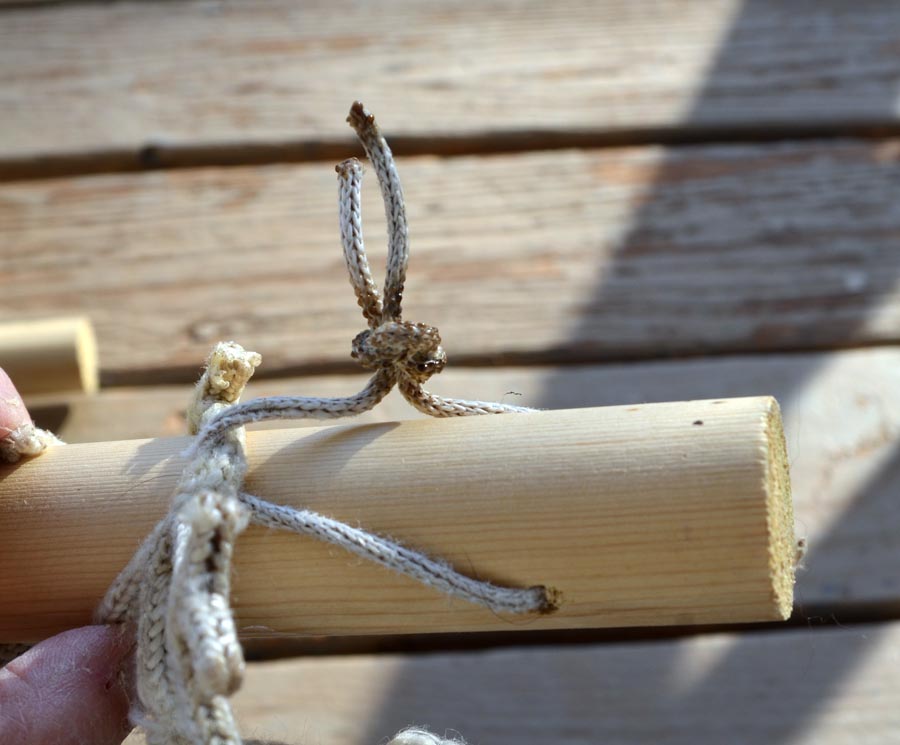
Using a piece of cording about 6" long, tie the end of the netting to the dowel,
through the holes you've drilled on each end, so the net stays stretched across the dowel. Do this on all four ends.
Burn your knot with the torch so it is more likely to stay tied.

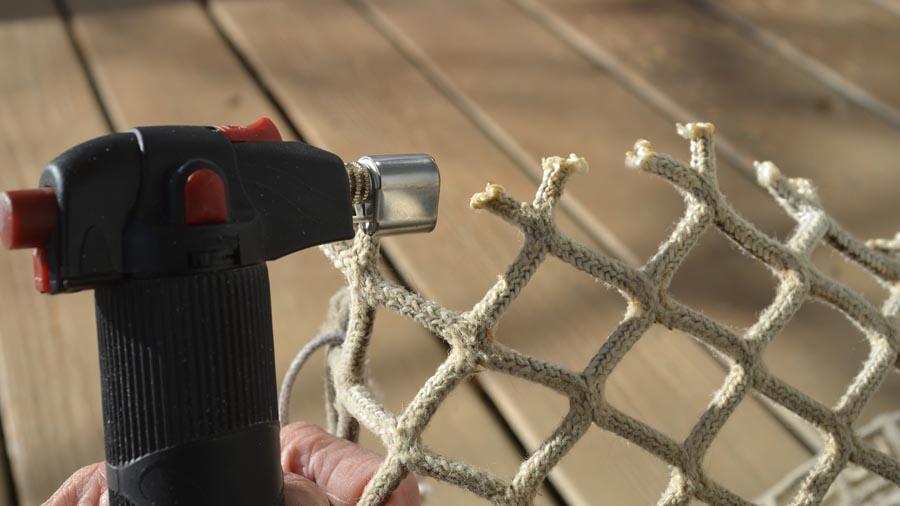
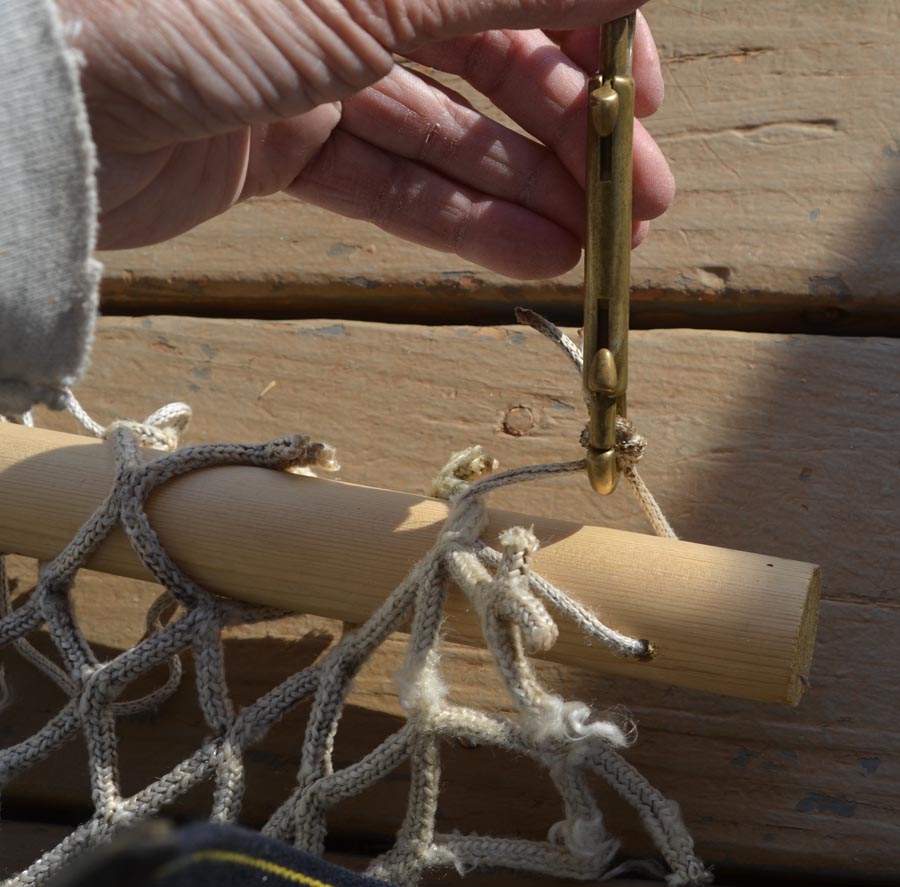
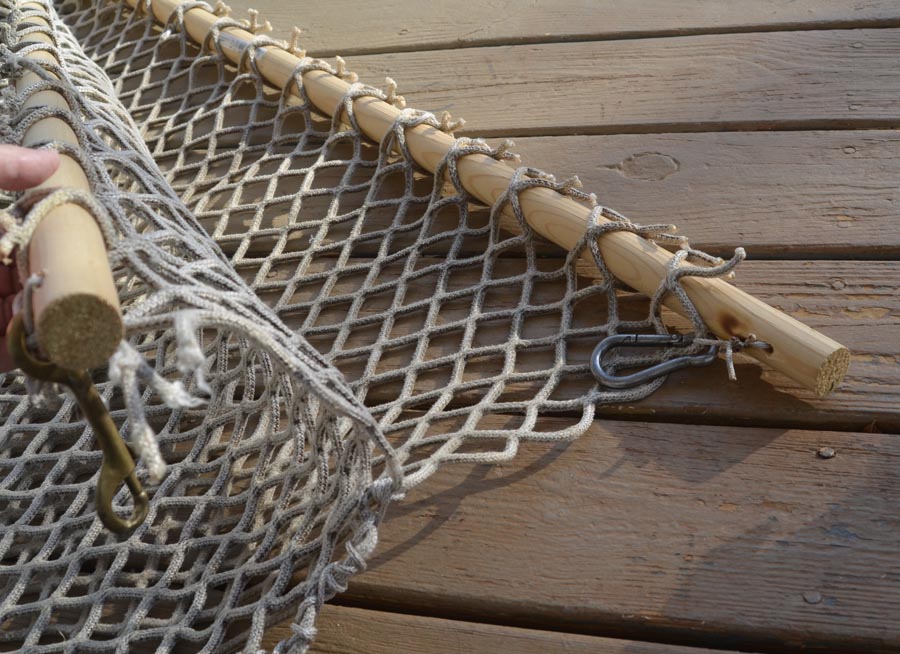
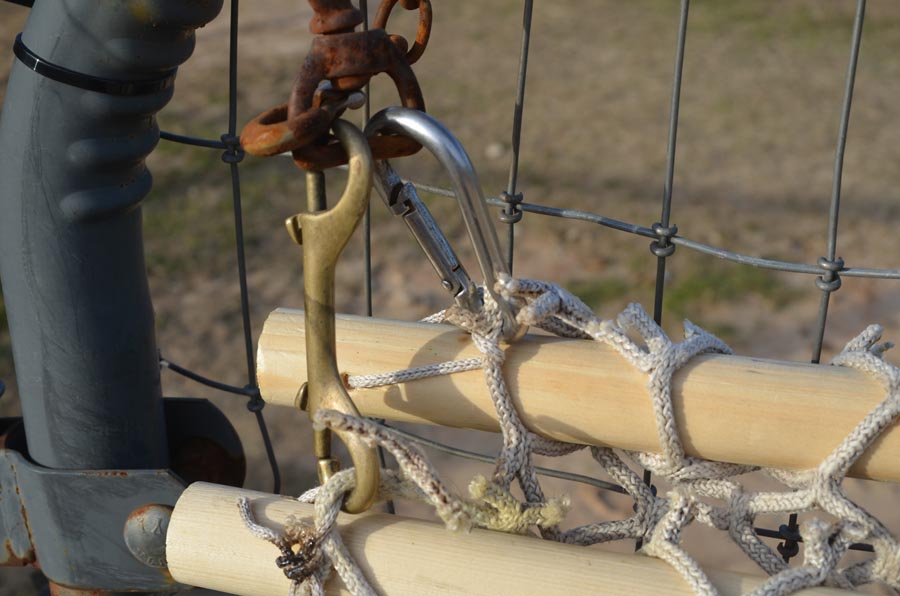
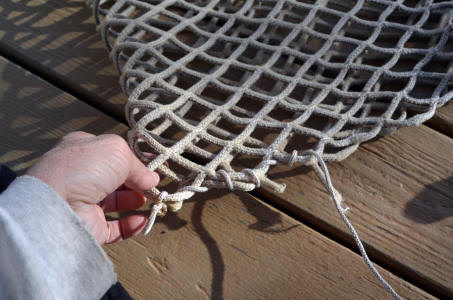
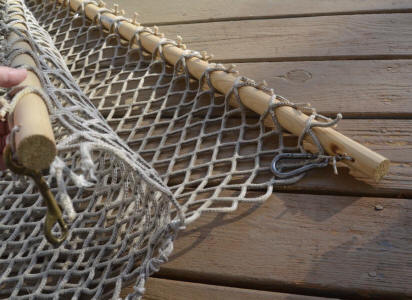
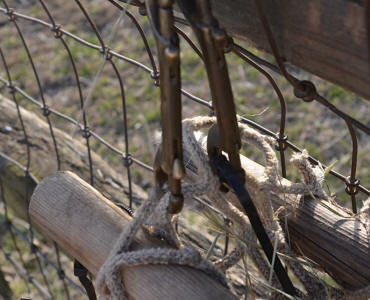
Attach your snaps to all four ends of the dowels. You can put the snap through just the cord but it is more secure if you go through the netting as well (see next picture).

I am using a spring snap for what will be the back side of the net, only because it's what I had on hand. I prefer the brass double ended snaps. Here you can see I took the end of the net
up in the snap along with the cord tie off.
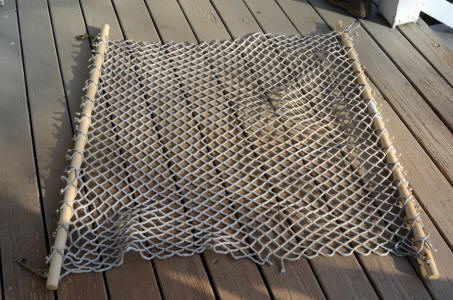
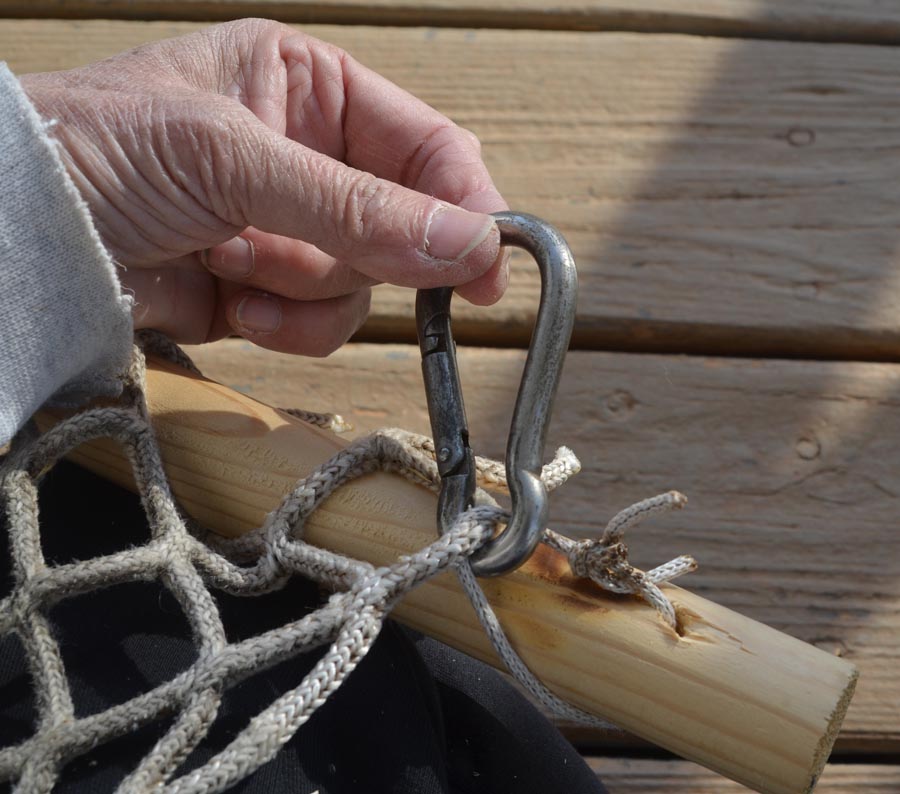
All snaps attached to the cords at each end of the dowels.
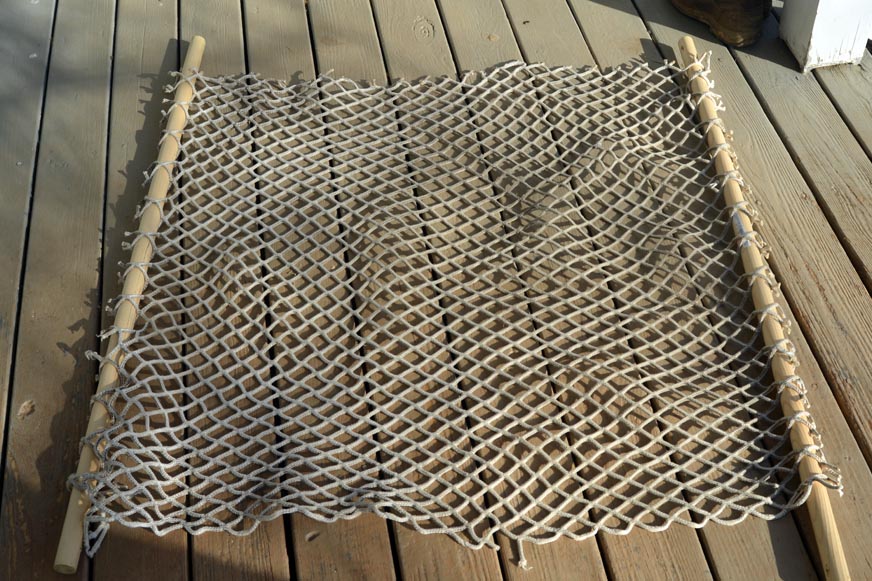
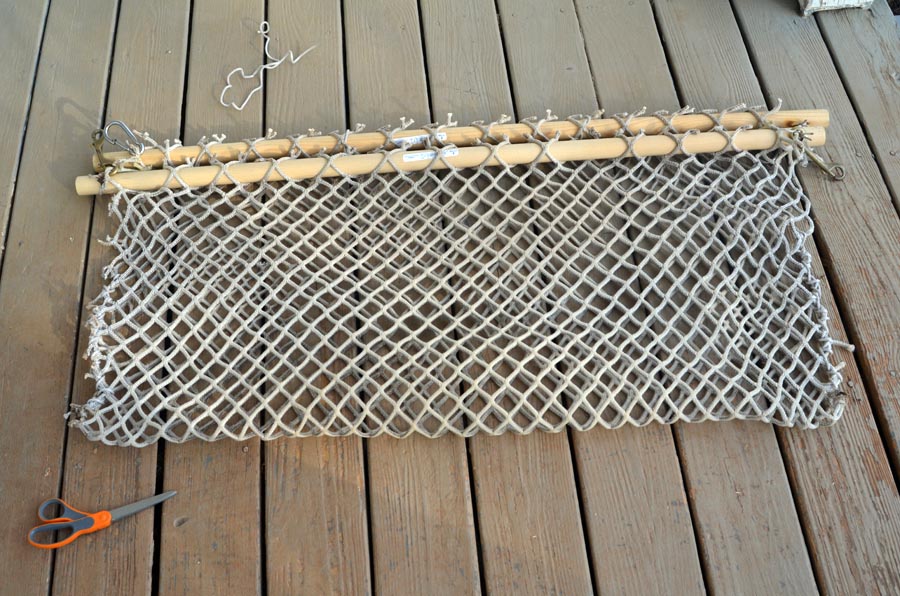
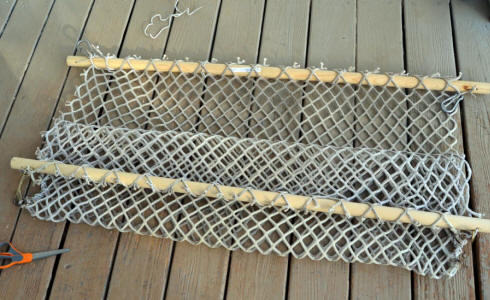
Fold the haynet in half so the dowels meet.
Now you are ready to start lacing up the sides of the net. You can see if I had started with a 5 or 6 foot
long piece of net I would have a bigger finished product. But this will work.
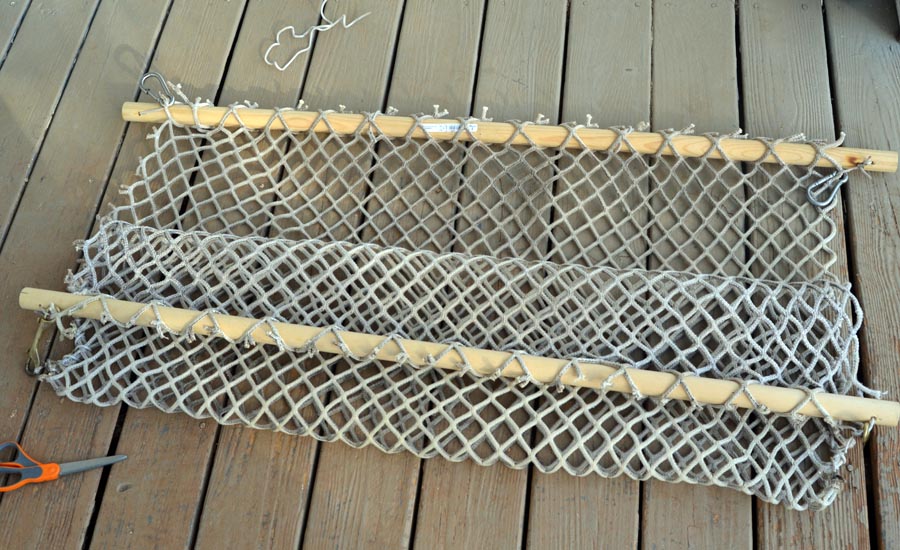
Cut a length of cord that is almost twice as long/deep as the sides of your net. Starting at one bottom corner, tie off the cord, leaving a bit of a tail. Lace
up the sides of the net.
Stop lacing about 8 inches from the dowels. You have to leave this open so the net can be filled once it is hung. Work your way back down the side of the net to the bottom, where you started. Tie the cording off to
the "tail" you left when you started the lacing process. Burn that knot so it is less likely to come untied.
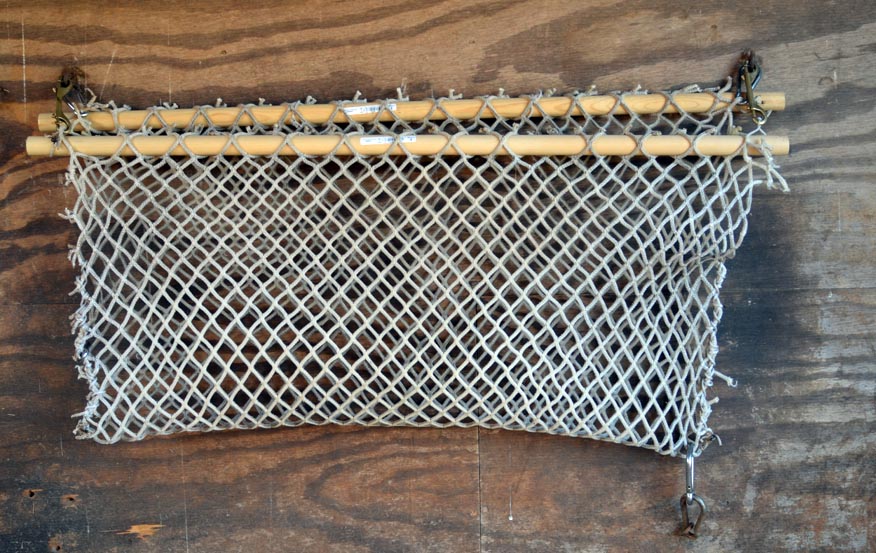
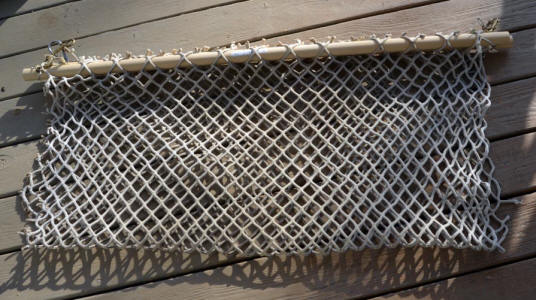
Open top of the net.

Lace up the other side of the net. Yay! You're done! I forgot to turn the cut edges to the inside of the net, but that is just cosmetic and I can still do it. Just turn the whole thing inside out.
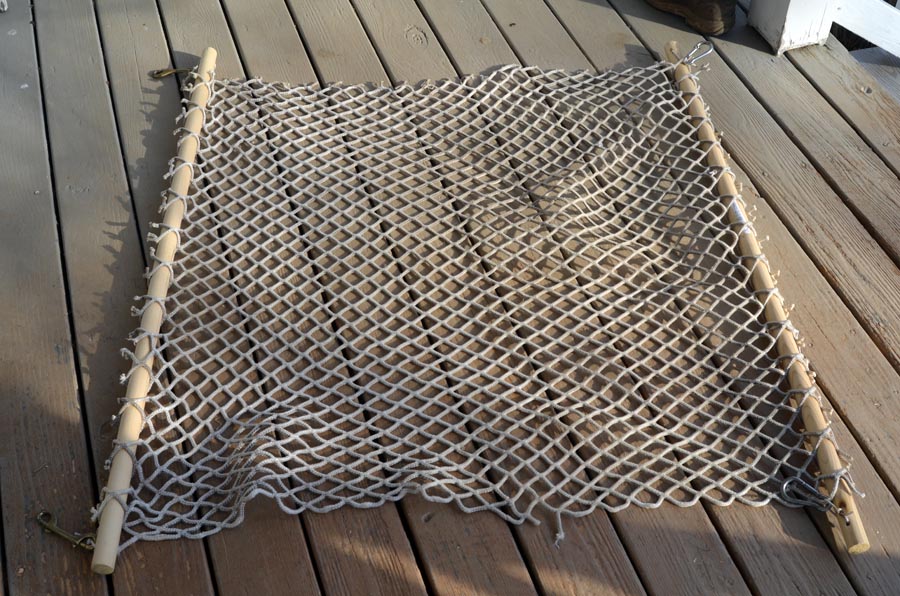
The finished, open net.
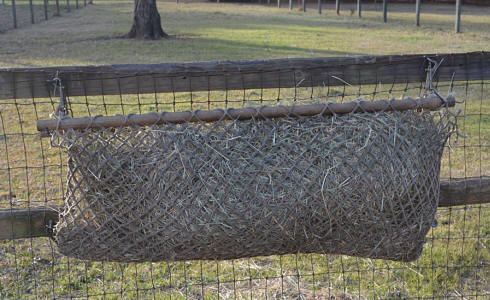
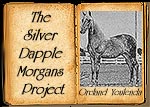
One of our nets hanging in the pasture on the fence. I strongly suggest running a post below the net, as shown here, to support it.
Otherwise the horses will have nothing to push against as they work
on getting hay out of the net except the fence, which will bend up if you have horse wire like this. There are screw eyes on the lower post and the net snaps to
those on both lower ends. If it is not secured this way horses can flip the whole net over to the other side of the fence.
It also creates more wear and tear on the top snaps
and attachments.

Attachment to fence using screw eyes at top and bottom sides.
My horses like to stick their muzzles in the top of the net and cheat eat. So I will often snap the outside snap to the netting on the back of the net,
to lock it closed at the top. Darn these smart Morgans!

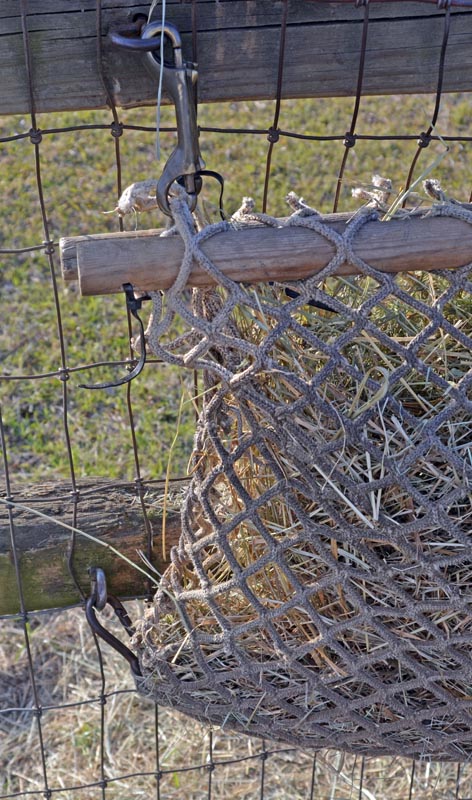
This is one of my original Hay Pockets, made by their originator in 2011. Still in use, just one minor repair to the netting on the lower left
and to the lace attachment at the dowels, which I have temporarily repaired with zip ties. In the summer most of the nets get taken down and
any repairs are made. Meanwhile, this works! Our stalls have open fronts, so this is mounted on the screw eyes in the top of the stall.
Shows how the net above is mounted to screw eyes installed in the top of the stall wall (four foot high).

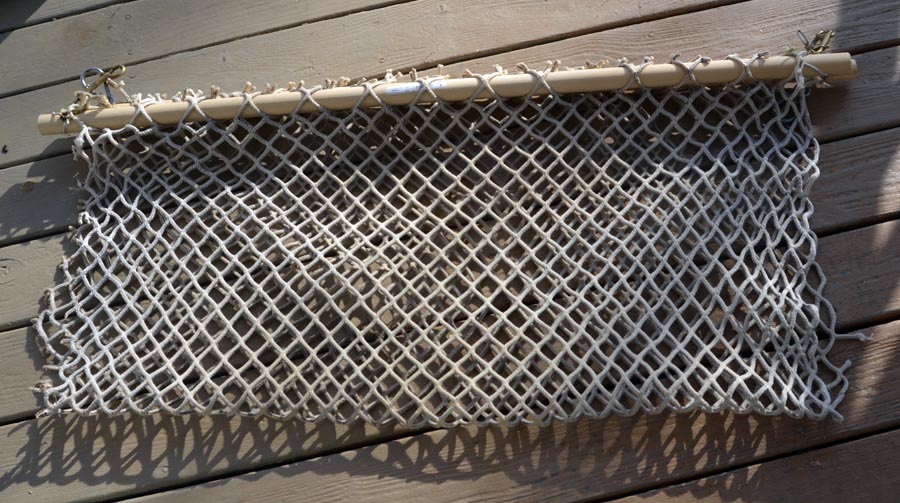
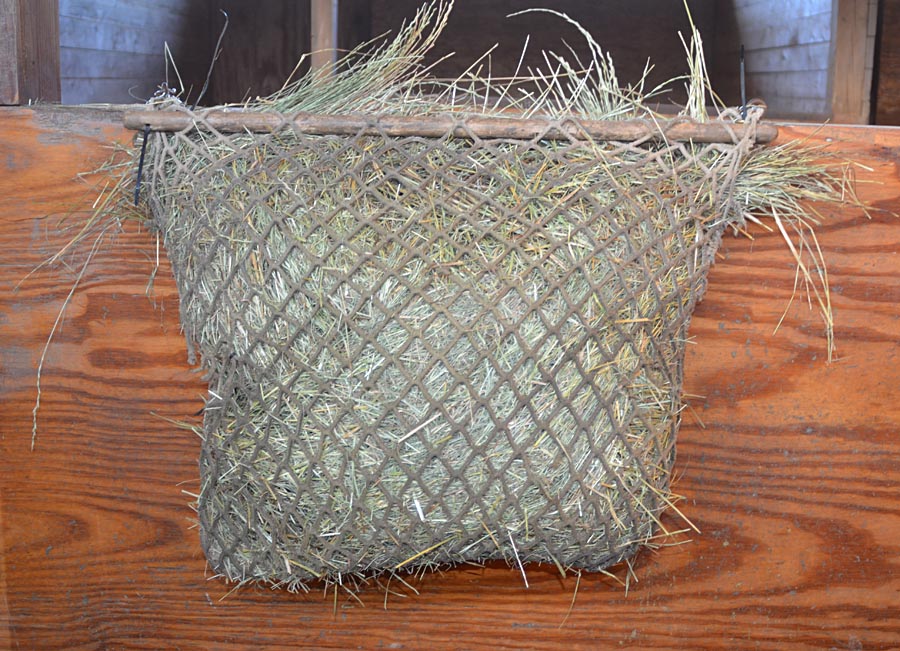
Here is my actual hay net project hanging on the wall in our run in shed. I will need to
move the screw eyes to
accommodate the new smaller size, but you can get an idea of how it is hung. I will also replace the spring snaps with double
ended snaps so the dowels hang more evenly at the top.
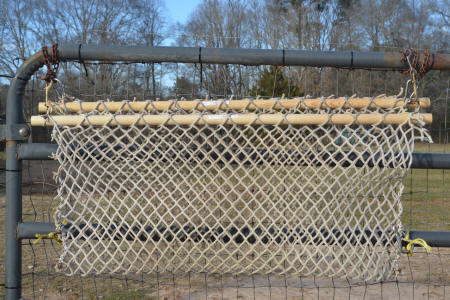
The new net hanging on a gate. I use old chain cut from chain lead lines (no
other use for them here) to hang the nets on the gates. You can use any length of chain you
have on hand. I suggest mounting the net closer to the hinged end of
the gate for less pull on the gate itself. The bottom snaps are attached to lengths of hay string
tied around the gate bars. Not fancy, but it works!
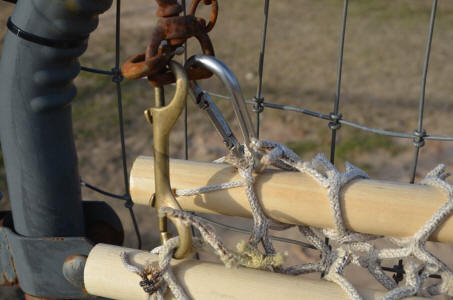
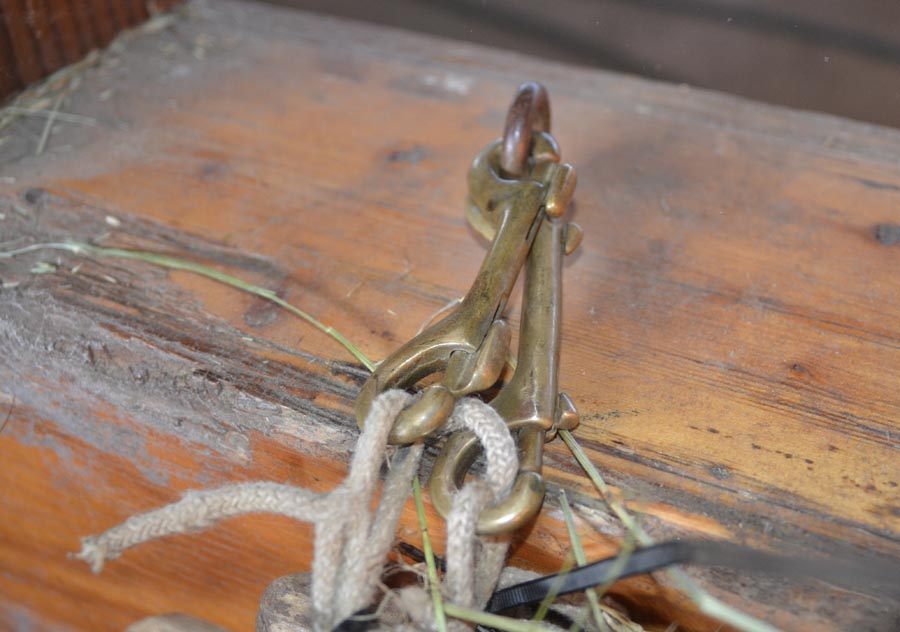
Showing attachment of the snaps to the old chain lead.
Back to the top
Back to Brookridge Morgans home page
|
|